Metaballs are organic-looking balls that deform as they merge or split, as shown in the picture below. It’s a neat little effect, often used to render liquids or gels. This is a tutorial on how to produce 2D metaballs in XNA. As a bonus, the code requires no custom shaders, and therefore works equally well on Windows Phone, Xbox, and PC.

To produce metaballs, you create a function, f(x, y), that becomes smaller as you get further from the metaball. This is your falloff function. It determines how strong the influence of the metaball is at any given point. Next, you sum all the falloff functions from all the metaballs. Any point that has a value greater than some threshold is part of the metaballs.
You can picture this as taking a rubber sheet and placing heavy marbles on it. The marbles will make wells in the sheet. These wells are your falloff function. Then you take this rubber sheet, and lower it carefully into a tray of paint, just enough so that wells are partly submerged. The painted areas would now look like metaballs.
We will implement this technique as follows:
- Make a metaball texture using a falloff function.
- For each metaball, draw the texture to a render target using additive blending.
- Draw the render target to the backbuffer using AlphaTestEffect.
Making the Metaball Texture
To make the metaball texture, we must first choose a falloff function. A good falloff function meets two requirements:
- It goes to zero after a given distance. This allows us to fit the entire non-zero area of the function in our texture.
- Smoothness. Otherwise you may get creases in your metaballs.
I used the following falloff function:
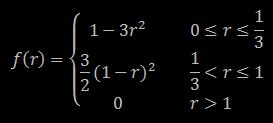
Where r is the distance from the center of the metaball. If we draw this function, with a value of 1 being white and 0 being black, it produces the texture below on the left. We will use this as the as alpha channel of our metaball texture so we can later threshold it using AlphaTestEffect. You can set the colour channels as you see fit. I coloured mine using a red and yellow gradient.
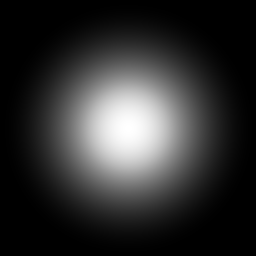
You could simply save the coloured image above, load it into your XNA project, and use it to make metaballs. However, if you’re interested in making your own metaball textures, the code to so is shown below. If you make your own texture, you can colour it as you like (in case you don’t like my impeccable taste).
int length = radius * 2;
Color[] colors = new Color[length * length];

for (int y = 0; y < length; y++)
{
    for (int x = 0; x < length; x++)
    {
        float distance = Vector2.Distance(Vector2.One,
            new Vector2(x, y) / radius);
        float alpha = Falloff(distance);

        colors[y * length + x] = PickWhateverColorYouLike();
        colors[y * length + x].A =
            (byte)MathHelper.Clamp(alpha * 256f + 0.5f, 0f, 255f);
    }
}

Texture2D tex = new Texture2D(GraphicsDevice, length, length);
tex.SetData(colors);
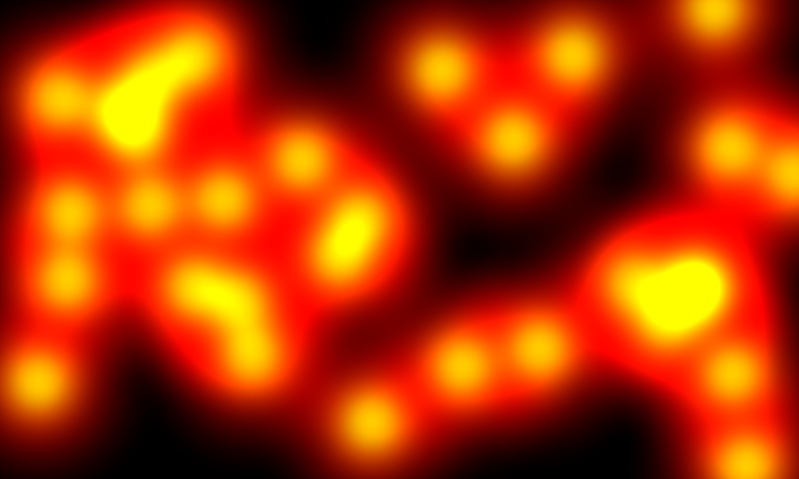
You can use different falloff functions to get different effects. Here is a square falloff function:

And the metaballs it produces:
Summing the Metaballs
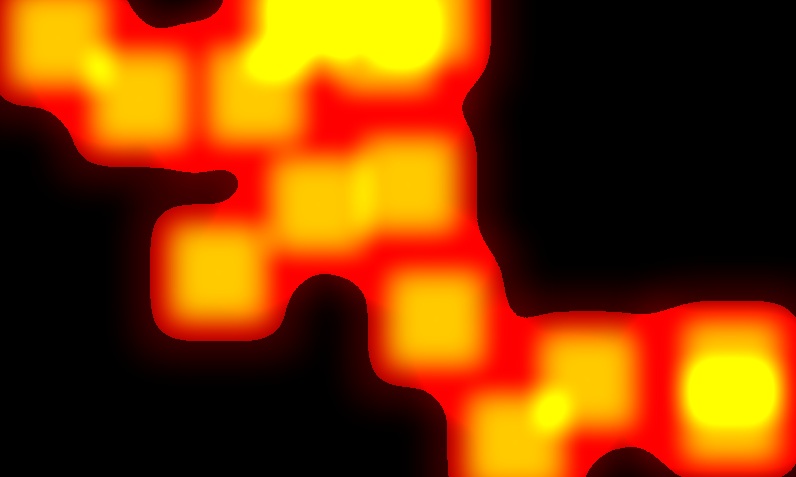
This step is simple. First, create a bunch of metaballs at different positions and a render target to draw them to. Then draw the metaballs to the render target using additive blending.
// class variable
List<Vector2> metaballPositions = new List<Vector2>();
RenderTarget2D metaballTarget;

// ...

// in Initialize()
Random r = new Random();
int width = GraphicsDevice.Viewport.Width;
int height = GraphicsDevice.Viewport.Height;
for (int i = 0; i < 30; i++)
	metaballPositions.Add(new Vector2(r.Next(width), r.Next(height)));

metaballTarget = new RenderTarget2D(GraphicsDevice, width, height);

// ...

// in Draw()
GraphicsDevice.SetRenderTarget(metaballTarget);
GraphicsDevice.Clear(Color.Transparent);

spriteBatch.Begin(SpriteSortMode.Deferred, BlendState.Additive);
foreach (var position in metaballPositions)
	spriteBatch.Draw(metaballTexture, position, Color.White);
spriteBatch.End();
Running this with my coloured metaball texture yields this:
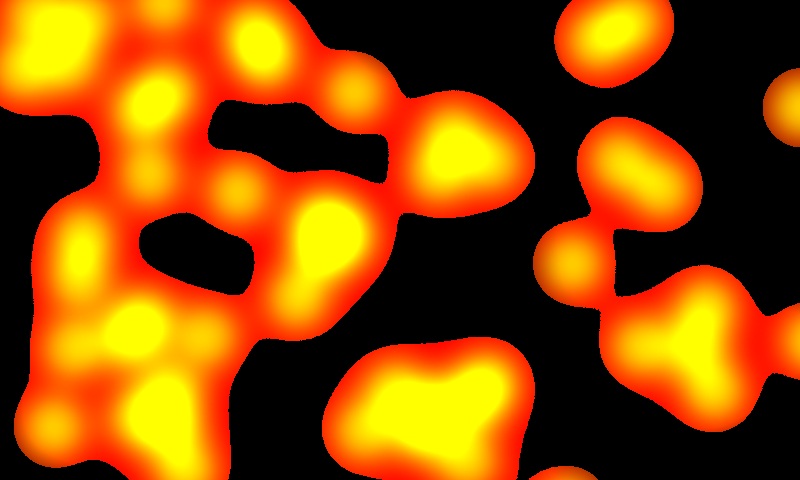
Thresholding the Metaballs
The final step is thresholding. We draw the render target to the backbuffer using AlphaTestEffect to only draw the parts where the alpha value is greater than some threshold.
// class variables
AlphaTestEffect alphaTest;

// ...

// in LoadContent() (or Initialize())
alphaTest = new AlphaTestEffect(GraphicsDevice);
var view = GraphicsDevice.Viewport;
alphaTest.Projection = Matrix.CreateTranslation(-0.5f, -0.5f, 0) *
    Matrix.CreateOrthographicOffCenter(0, view.Width, view.Height, 0, 0, 1);
alphaTest.ReferenceAlpha = 128; // our threshold

// ...

// in Draw()
GraphicsDevice.SetRenderTarget(null); // draw to the backbuffer
GraphicsDevice.Clear(Color.Black);

spriteBatch.Begin(SpriteSortMode.Deferred, BlendState.Opaque,
    null, null, null, alphaTest);
spriteBatch.Draw(metaballTarget, Vector2.Zero, Color.White);
spriteBatch.End();
And here’s the result:
Conclusion
That’s all there is to it. In my demo, I added a few extra features to make it look nicer. The metaballs move around and I added a faint glow behind them. I also added some different colour schemes you can cycle through. For the Windows Phone version I reduced the resolution a bit and drew fewer metaballs to maintain good performance. The Windows Phone has a relatively weak fill rate, so drawing fewer pixels helps a lot.
Download the complete code sample here. Or download the Windows Phone 7 Demo, called Lava Lamp.
Pingback: 2d Metaballs with canvas! | Somethinghitme
Pingback: 40+ Fantastic Game Development Tutorials From Across the Web | Gamedevtuts+
Pingback: Cool Effects (XNA & MonoGame) ← Int6 Studios
Pingback: Directx Toolkit AlphatestEffect | ?????